How to view a virtual GeoTIFF in QGIS
Configure QGIS
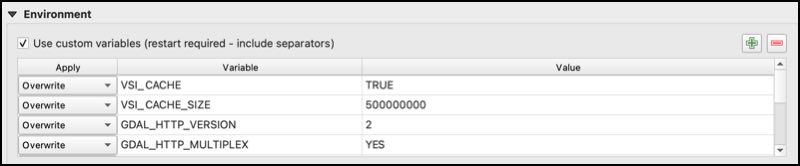
In the QGIS preferences (menu -> QGIS -> Preferences) in the "System" tab set the following into the Environment Variables:
VSI_CACHE=TRUE
VSI_CACHE_SIZE=500000000
GDAL_HTTP_VERSION=2
GDAL_HTTP_MULTIPLEX=YES
GDAL_HTTP_MULTIRANGE=YES
GDAL_HTTP_MERGE_CONSECUTIVE_RANGES=NO
CPL_LOG=/tmp/gdal_log.txt
CPL_LOG_ERRORS=ON
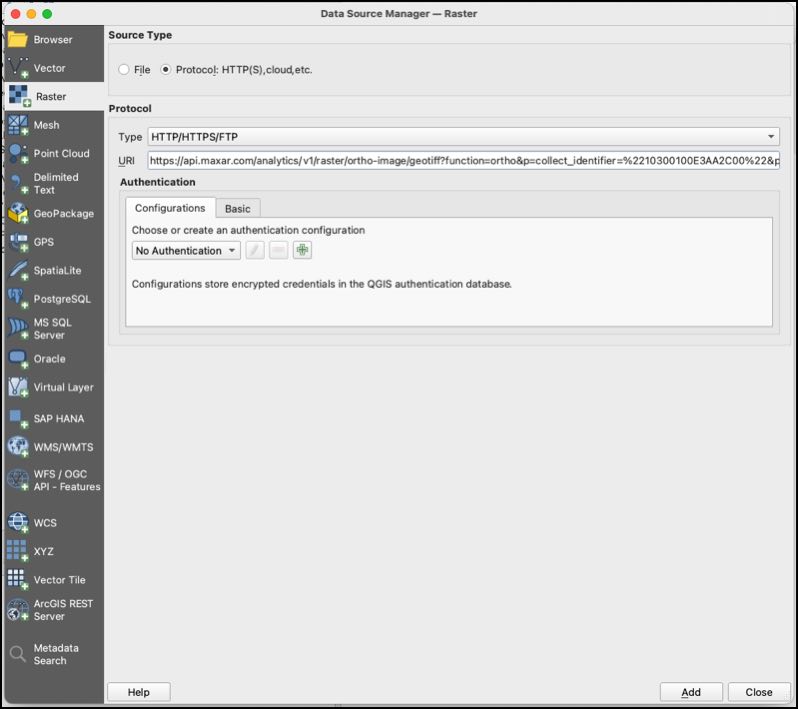
Open the image in QGIS
Use the "Data Source Manager" to open a virtual GeoTIFF image as a Raster data source.
- Select "menu -> Layer -> Data Source Manager".
- Select the "Protocol: HTTP(S), cloud, etc." Source Type.
- Add the URL.
Note: when adding the URL to QGIS, the URL should NOT include the /VSICURL/ prefix and the URL should be URL encoded.
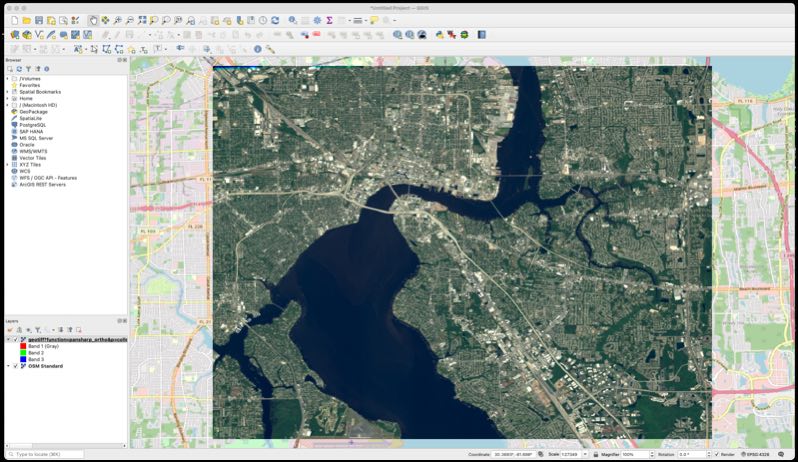
Example QGIS URL:
https://api.maxar.com/analytics/v1/raster/ortho-with-overviews/geotiff?function=pansharp_ortho&p=collect_identifier=%2210300100E538FE00%22&p=crs=%22EPSG:3857%22&p=bands=%22red,green,blue%22&p=dra=true&maxar_api_key=<YOUR_KEY>
Note: This example uses the ortho-with-overviews IPE Script becasue it is suitable for visualization at any map scale.
And click the "Add" Button to display the image.