Example API Bruno Collection
This collection of example API calls was created using the API client "Bruno". Bruno is a free, open-source API client that runs locally and does not save credentials or data to a cloud environment. You can import this collection into other API clients, but it may require some modifications. For Vantor's Account Services API and administrator calls, see the Account Services guide.
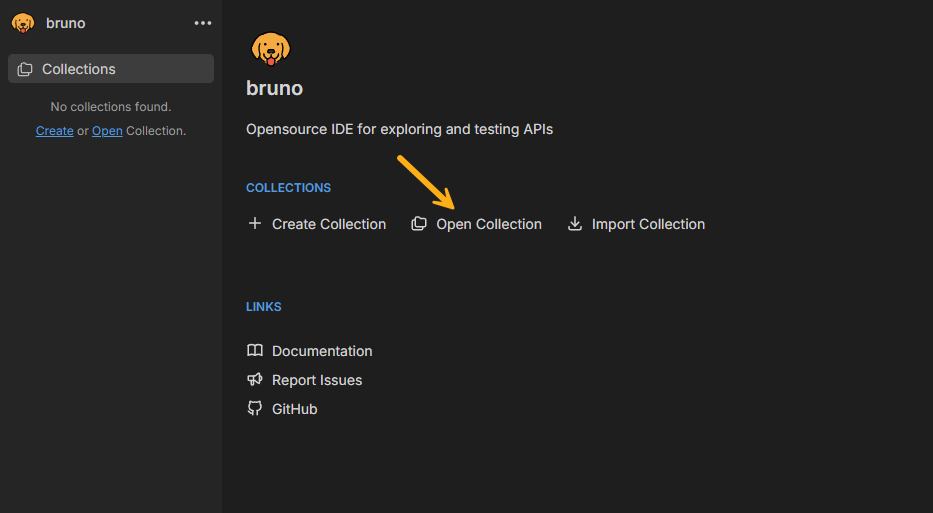
Importing the collection to Bruno
- Download the Collection zip file. Unzip the file to a location you want to keep it. The uncompressed directory is labeled
hub_api. - Open Bruno, then select "Open Collection" from the home page.
- Navigate to the
hub_apidirectory on your local drive and select it. Once you've uploaded the collection it will appear in the navigation pane on the left side of the application.
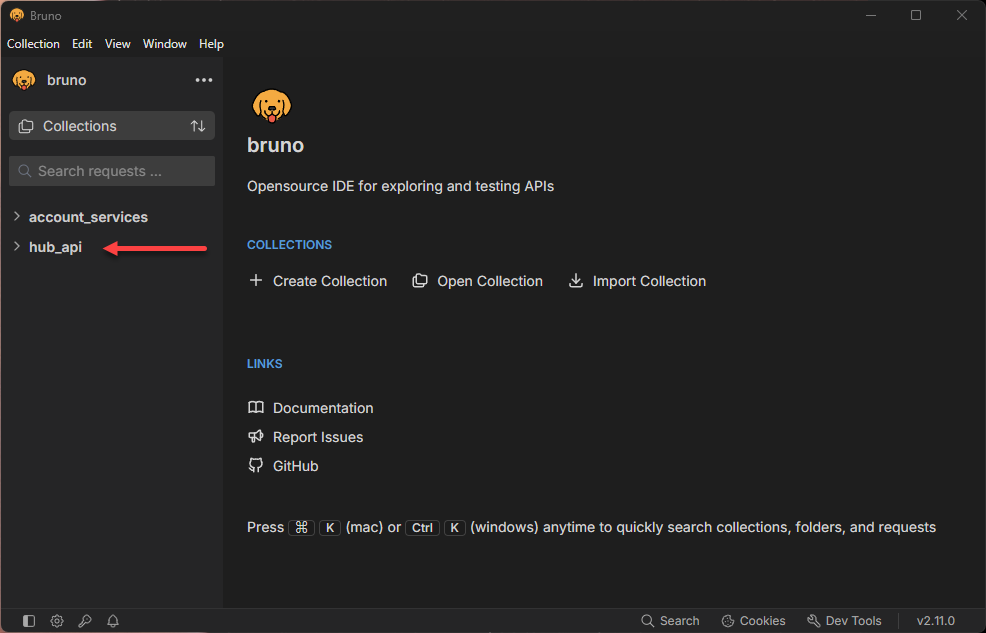
Note: When prompted, choose "safe mode". The "Developer" version is not needed to run examples in the collection.
Authentication
The Bruno collection has been set up to use an API key for authentication. The authentication method is set at the top of the collection. The value is set up as an environment variable.
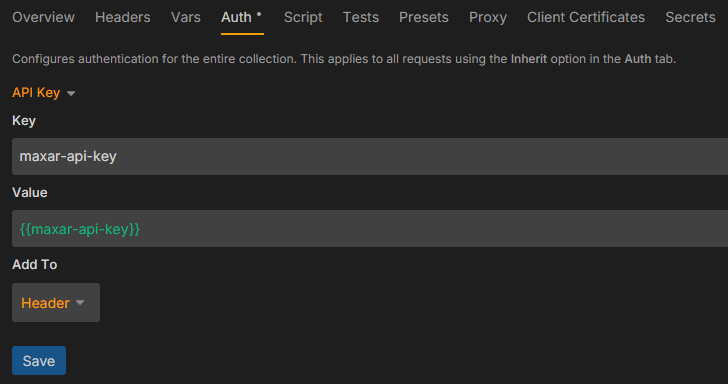
You can either create an environment file that stores your API key, or you can put your API key directly in the value field. If you store your API key, do not share your saved collection file with anyone.
Never share your API key with anyone. If you share a Bruno collection with others, make sure the API key is not stored in the collection file. If you inadvertently share your API key, submit a
delete a single keycall within theAuth/API keysdirectory to invalidate it.
Get API keys
There are two ways to get API keys to authenticate your API calls: Through the Hub UI or through the API. Both methods can be used to generate a single API key or multiple API keys. If you generate an API key using the API, your API key will be automatically stored as a variable in your environment.
API keys from the Hub UI
-
Sign in to Vantor Hub
-
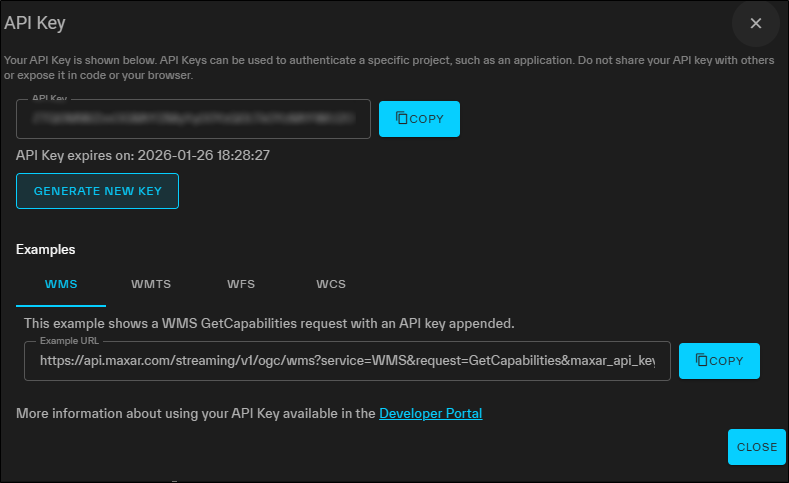
Select your initials in the lower left corner of the window to expand the profile menu and select "API Key" from the list.
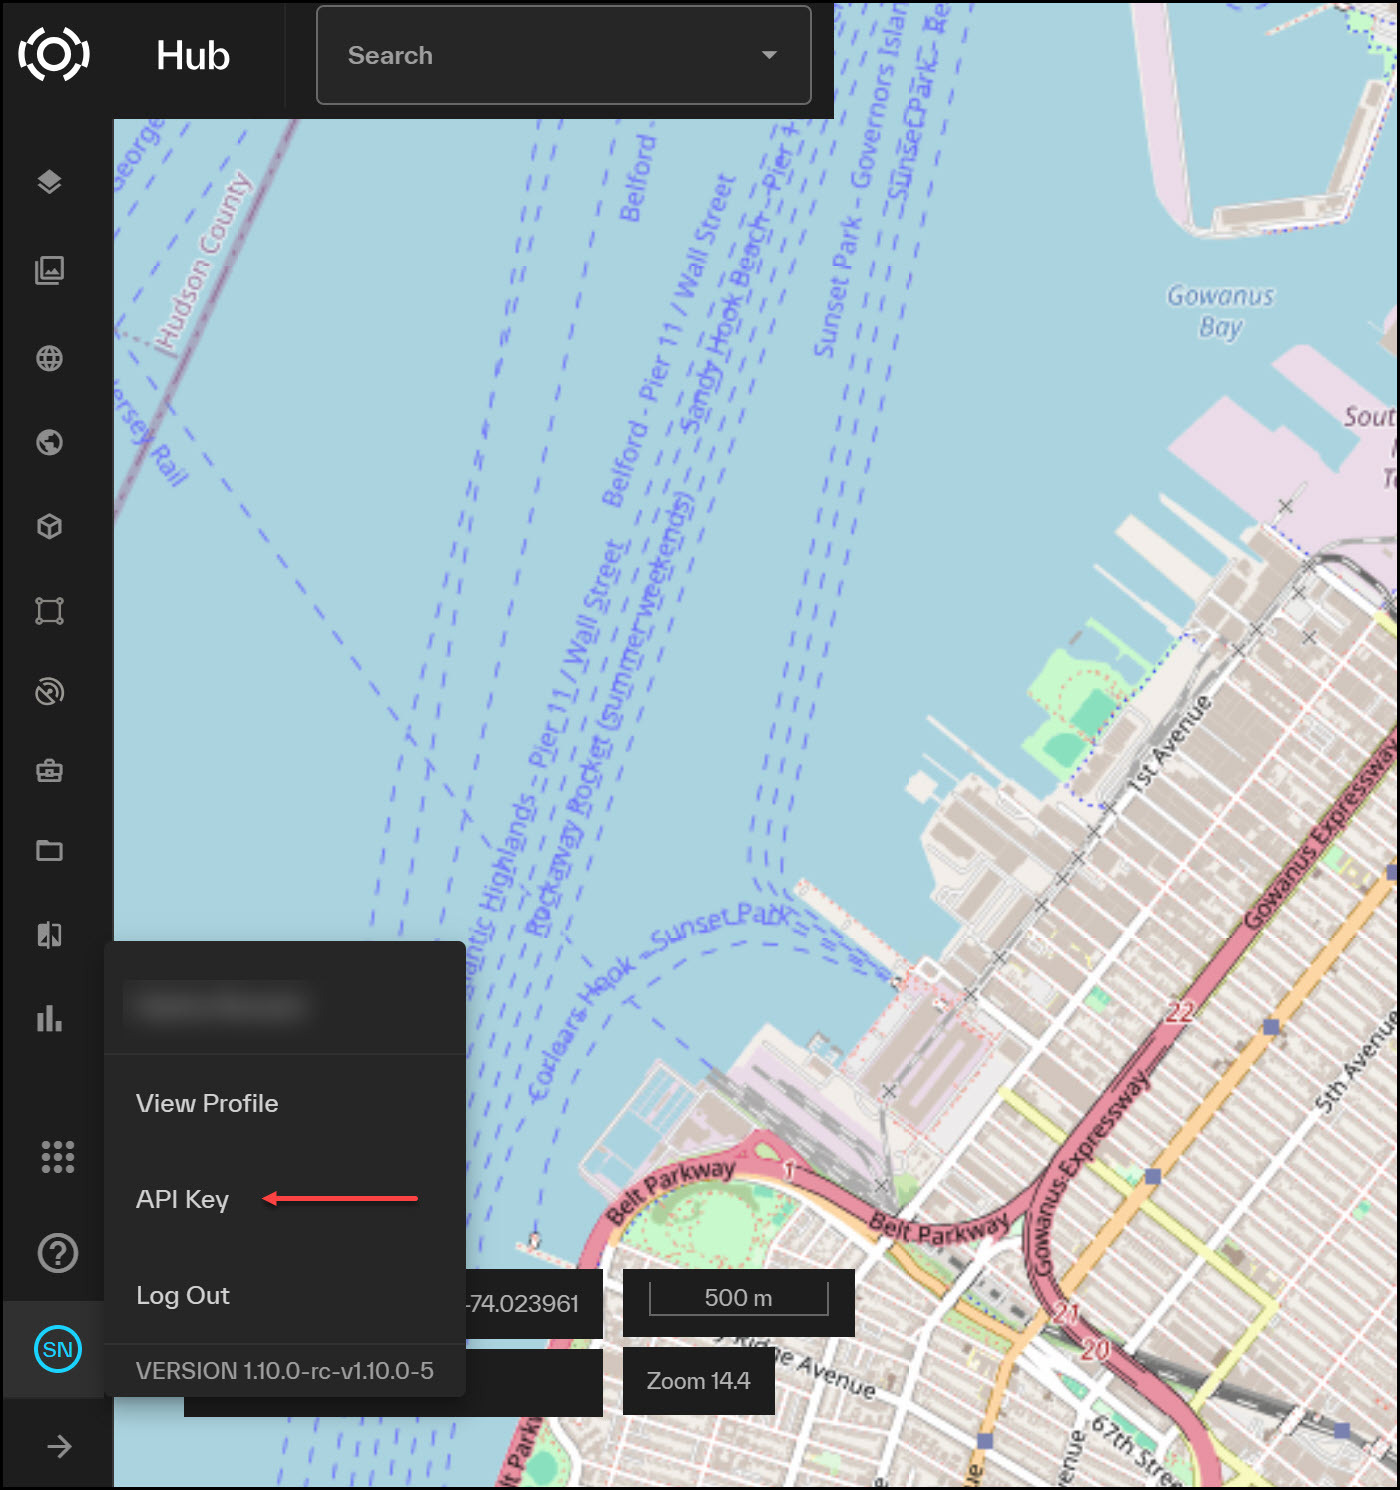
- From the API key menu, select the "copy" button to copy your API key.
- Create an environment file in Bruno with
maxar-api-keyas a variable.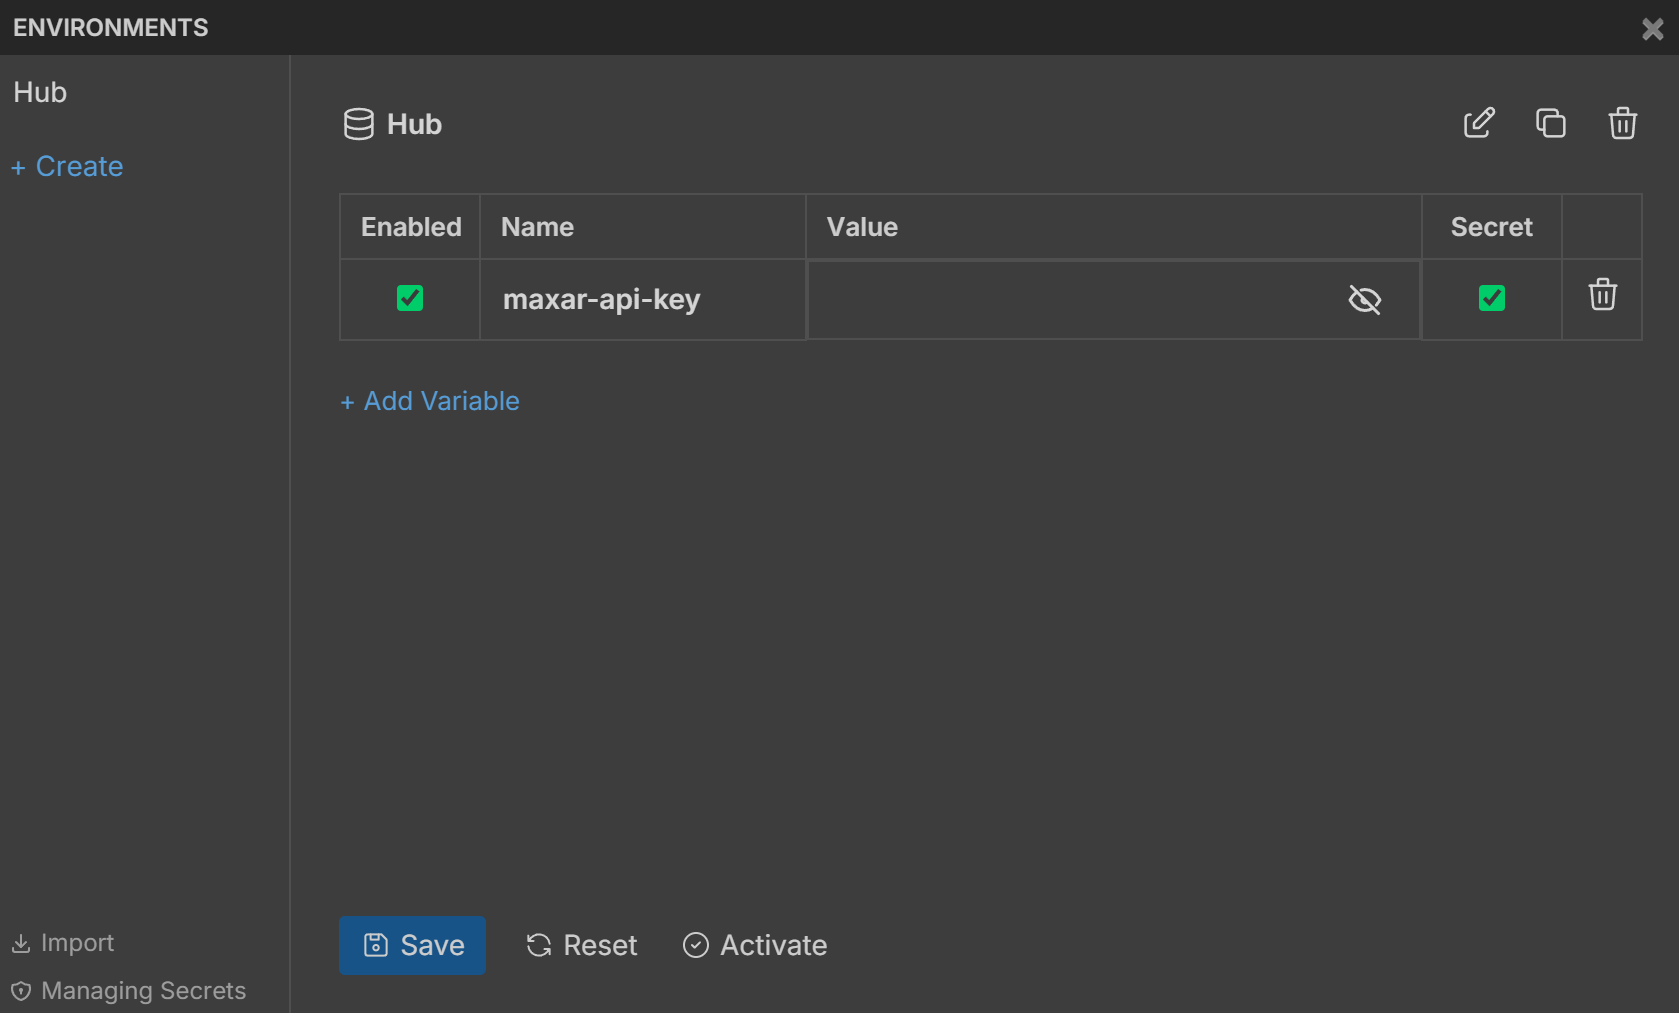
Be sure to save your environment after making changes.
Generate an API key programmatically
To get an API key programmatically, you'll need to store additional variables in your environment file and fetch a bearer token.
-
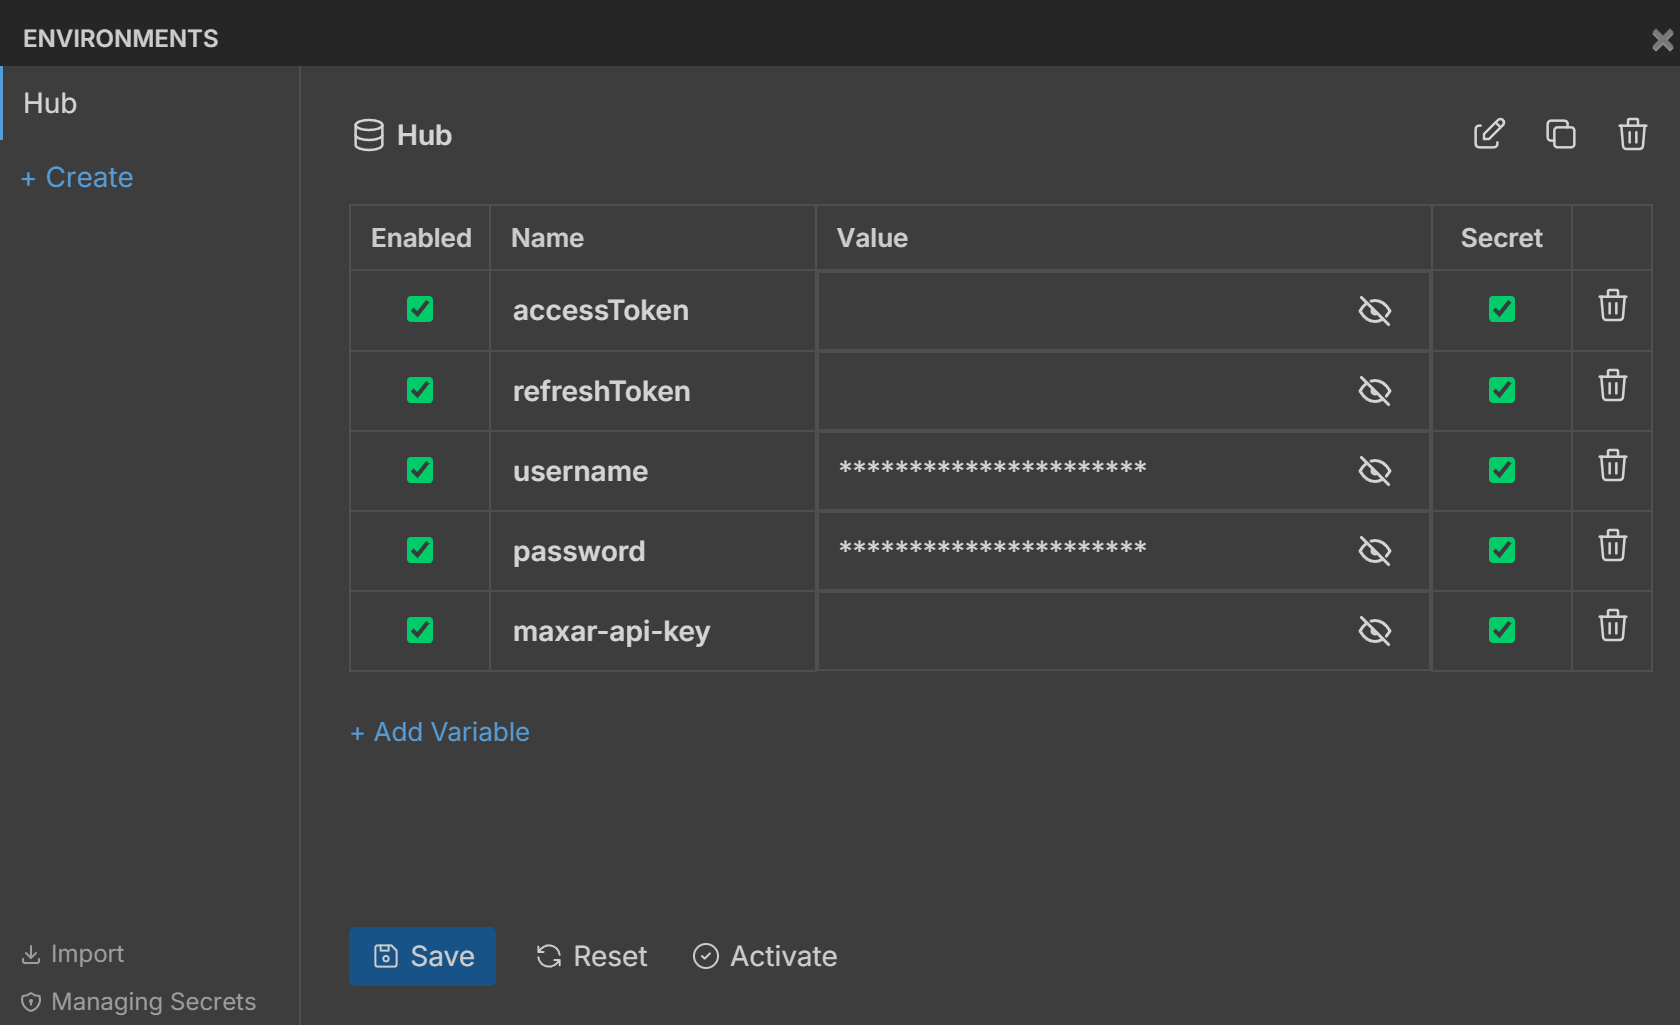
Set up an environment file with the following variables. Username and password are your account credentials.
-
From the "Auth" folder in the collection, choose the POST Get Auth token request. Click the arrow at the end of the line to run the request. This will generate a token and store it as the accessToken and refreshToken in your environment.
-
To generate an API key, from within the "Auth" folder, choose "API Keys", then "Generate an API key". Click the arrow at the end of the line to generate a new API key. Your API key will be saved to your environment.
For more information about API keys, see the API keys guide.
Using the Auth Type "Bearer Token"
You can use a bearer token to authenticate requests in this collection instead of an API key. To do so, change the auth type at the top level of the collection to "Bearer Token". All requests will inherit the new auth type.
-
Click the three dots next to the collection name and choose "settings" from the menu.
-
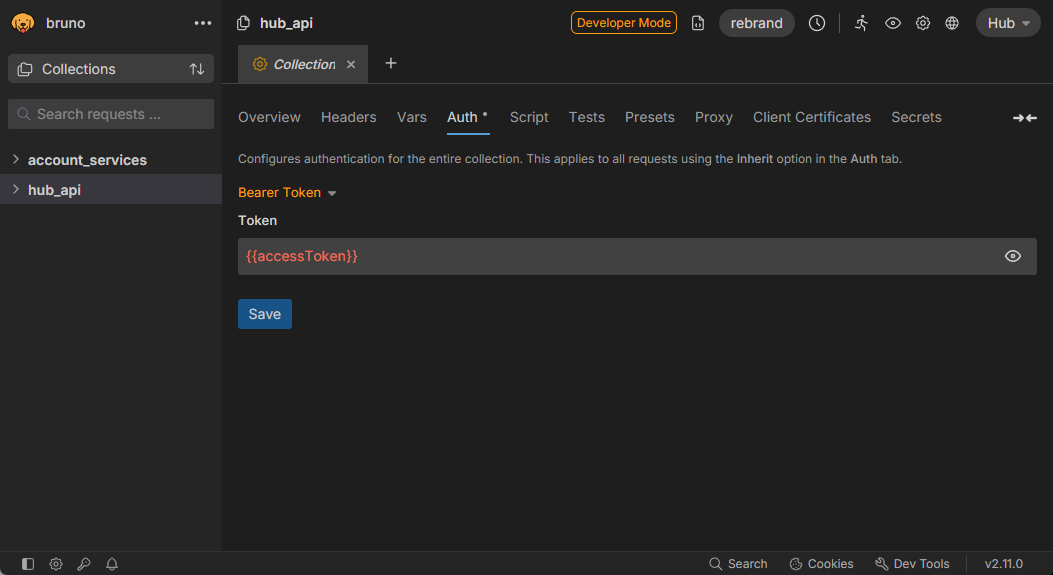
From the Auth tab, select the dropdown arrow next to "API Key" and choose Bearer Token from the menu
-
In the "Token" box, use a variable for the value:
{{accessToken}}
Bearer tokens are short-lived, so you will need to fetch a new token regularly if you choose this method. For more information about Bearer tokens, see the get a token guide.
Using the API Collection in Bruno
Once you've stored your API key or Bearer token, you can run requests in this collection.
-
Navigate to the request you want to run
-
Review the data in the "Params" tab or the "Body" to view the request. You can run the request example, or you can update the values or add parameters to change or narrow your results.
-
Click the arrow at the end of the request line to run the request.
-
View the "Response" panel to see the status of the request and the response.
Bruno and S3 Redirects
As noted in this issue, Bruno passes on authorization headers when redirecting requests. This can cause an error in this scenario:
- You are requesting a STAC asset from the Discovery API
- The asset redirects to an S3 bucket location
- You are using OAuth bearer tokens for authorization.
The redirect adds a new access token for specifically for Amazon S3. However S3 will error when it encounters more than one recognized authorization header. For the redirect to work the OAuth bearer token must not be included.
This is not unique to Bruno and you may encounter this from other clients like web browsers and other API tools. Some clients allow you to disable forwarding certain headers to fix this - check their docs to see if there is an option to disable header forwarding in redirects.
Until Bruno adds this functionality, use API keys instead of OAuth bearer tokens to request STAC assets. Since the API key is unknown to Amazon S3 it does not trigger the error.